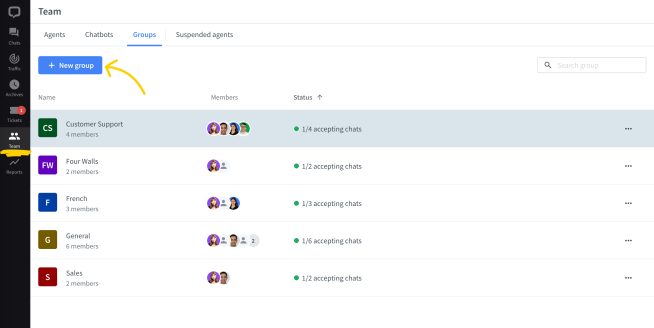
Groups are very useful if you have multiple departments handling different cases, e.g., Sales and Support. They can significantly shorten case resolution time and reducetransfers between agents in different departments.
Groups are available in Team, Business and Enterprise plans.
Groups are available in Team, Business and Enterprise plans.
General group is a default LiveChat setup that includes all of your agents. You can’t edit this group. Instead, you can replace it with a custom group using routing rules.
General group is a default LiveChat setup that includes all of your agents. You can’t edit this group. Instead, you can replace it with a custom group using routing rules.
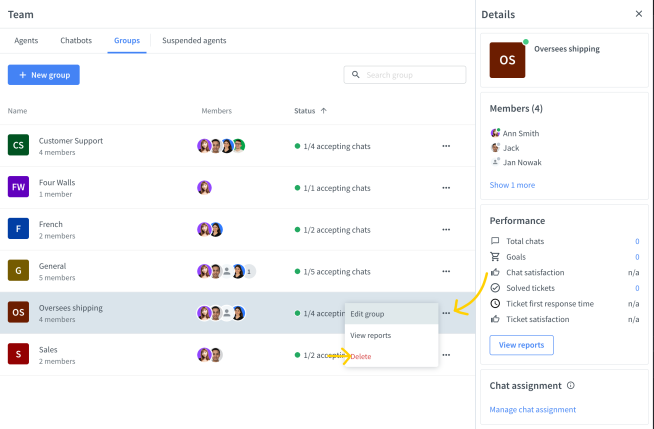
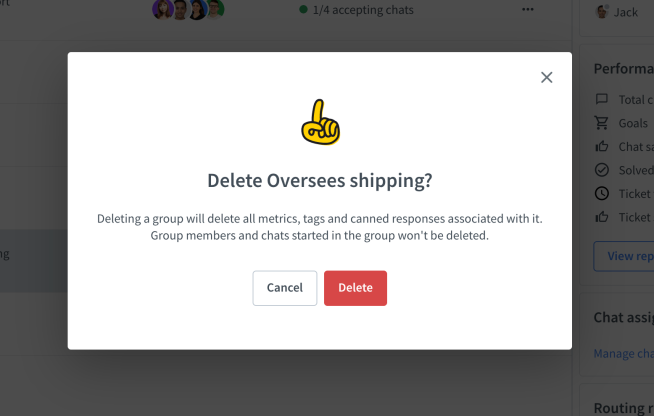
Delete a group
1
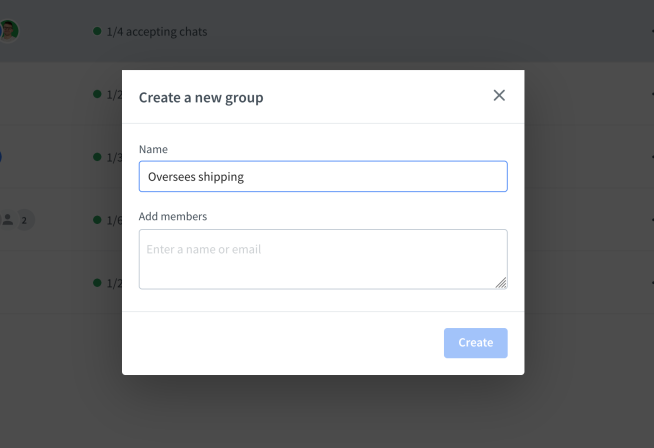
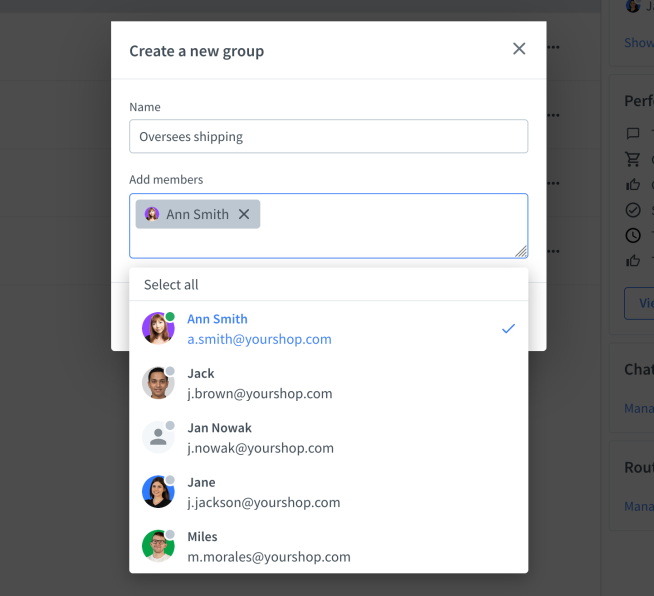
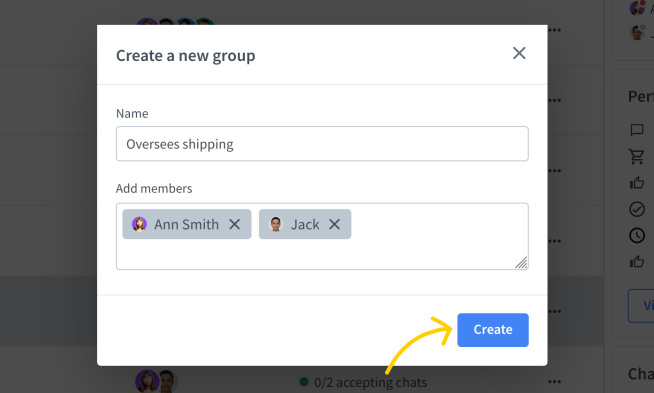
First, go to Team>Groups and select the group to delete.
2
Select Delete from the drop-down menu.
3
To confirm, select Delete again.
Assign groups to websites and pages
You can assign a different group to each site or page you use. For example, when a chat starts on a pricing page, it will be routed to your sales team. This way, you can manage all your pages and sites using one LiveChat license.
Once your the members of your team are assignet to the appropriate groups, you can create group-specific canned responses. This way agents can get to the essential messages quicker. Learn how to create canned responses for groups.
Once your the members of your team are assignet to the appropriate groups, you can create group-specific canned responses. This way agents can get to the essential messages quicker. Learn how to create canned responses for groups.
If you require a more sophisticated and custom-made set up, contact one of our recommenced partners to get a perfect solution from industry experts.
If you require a more sophisticated and custom-made set up, contact one of our recommenced partners to get a perfect solution from industry experts.
Add group selection to pre-chat form
You can add a group selection to your pre-chat form to let customers choose the right department before they start a chat. To do that, follow these steps:
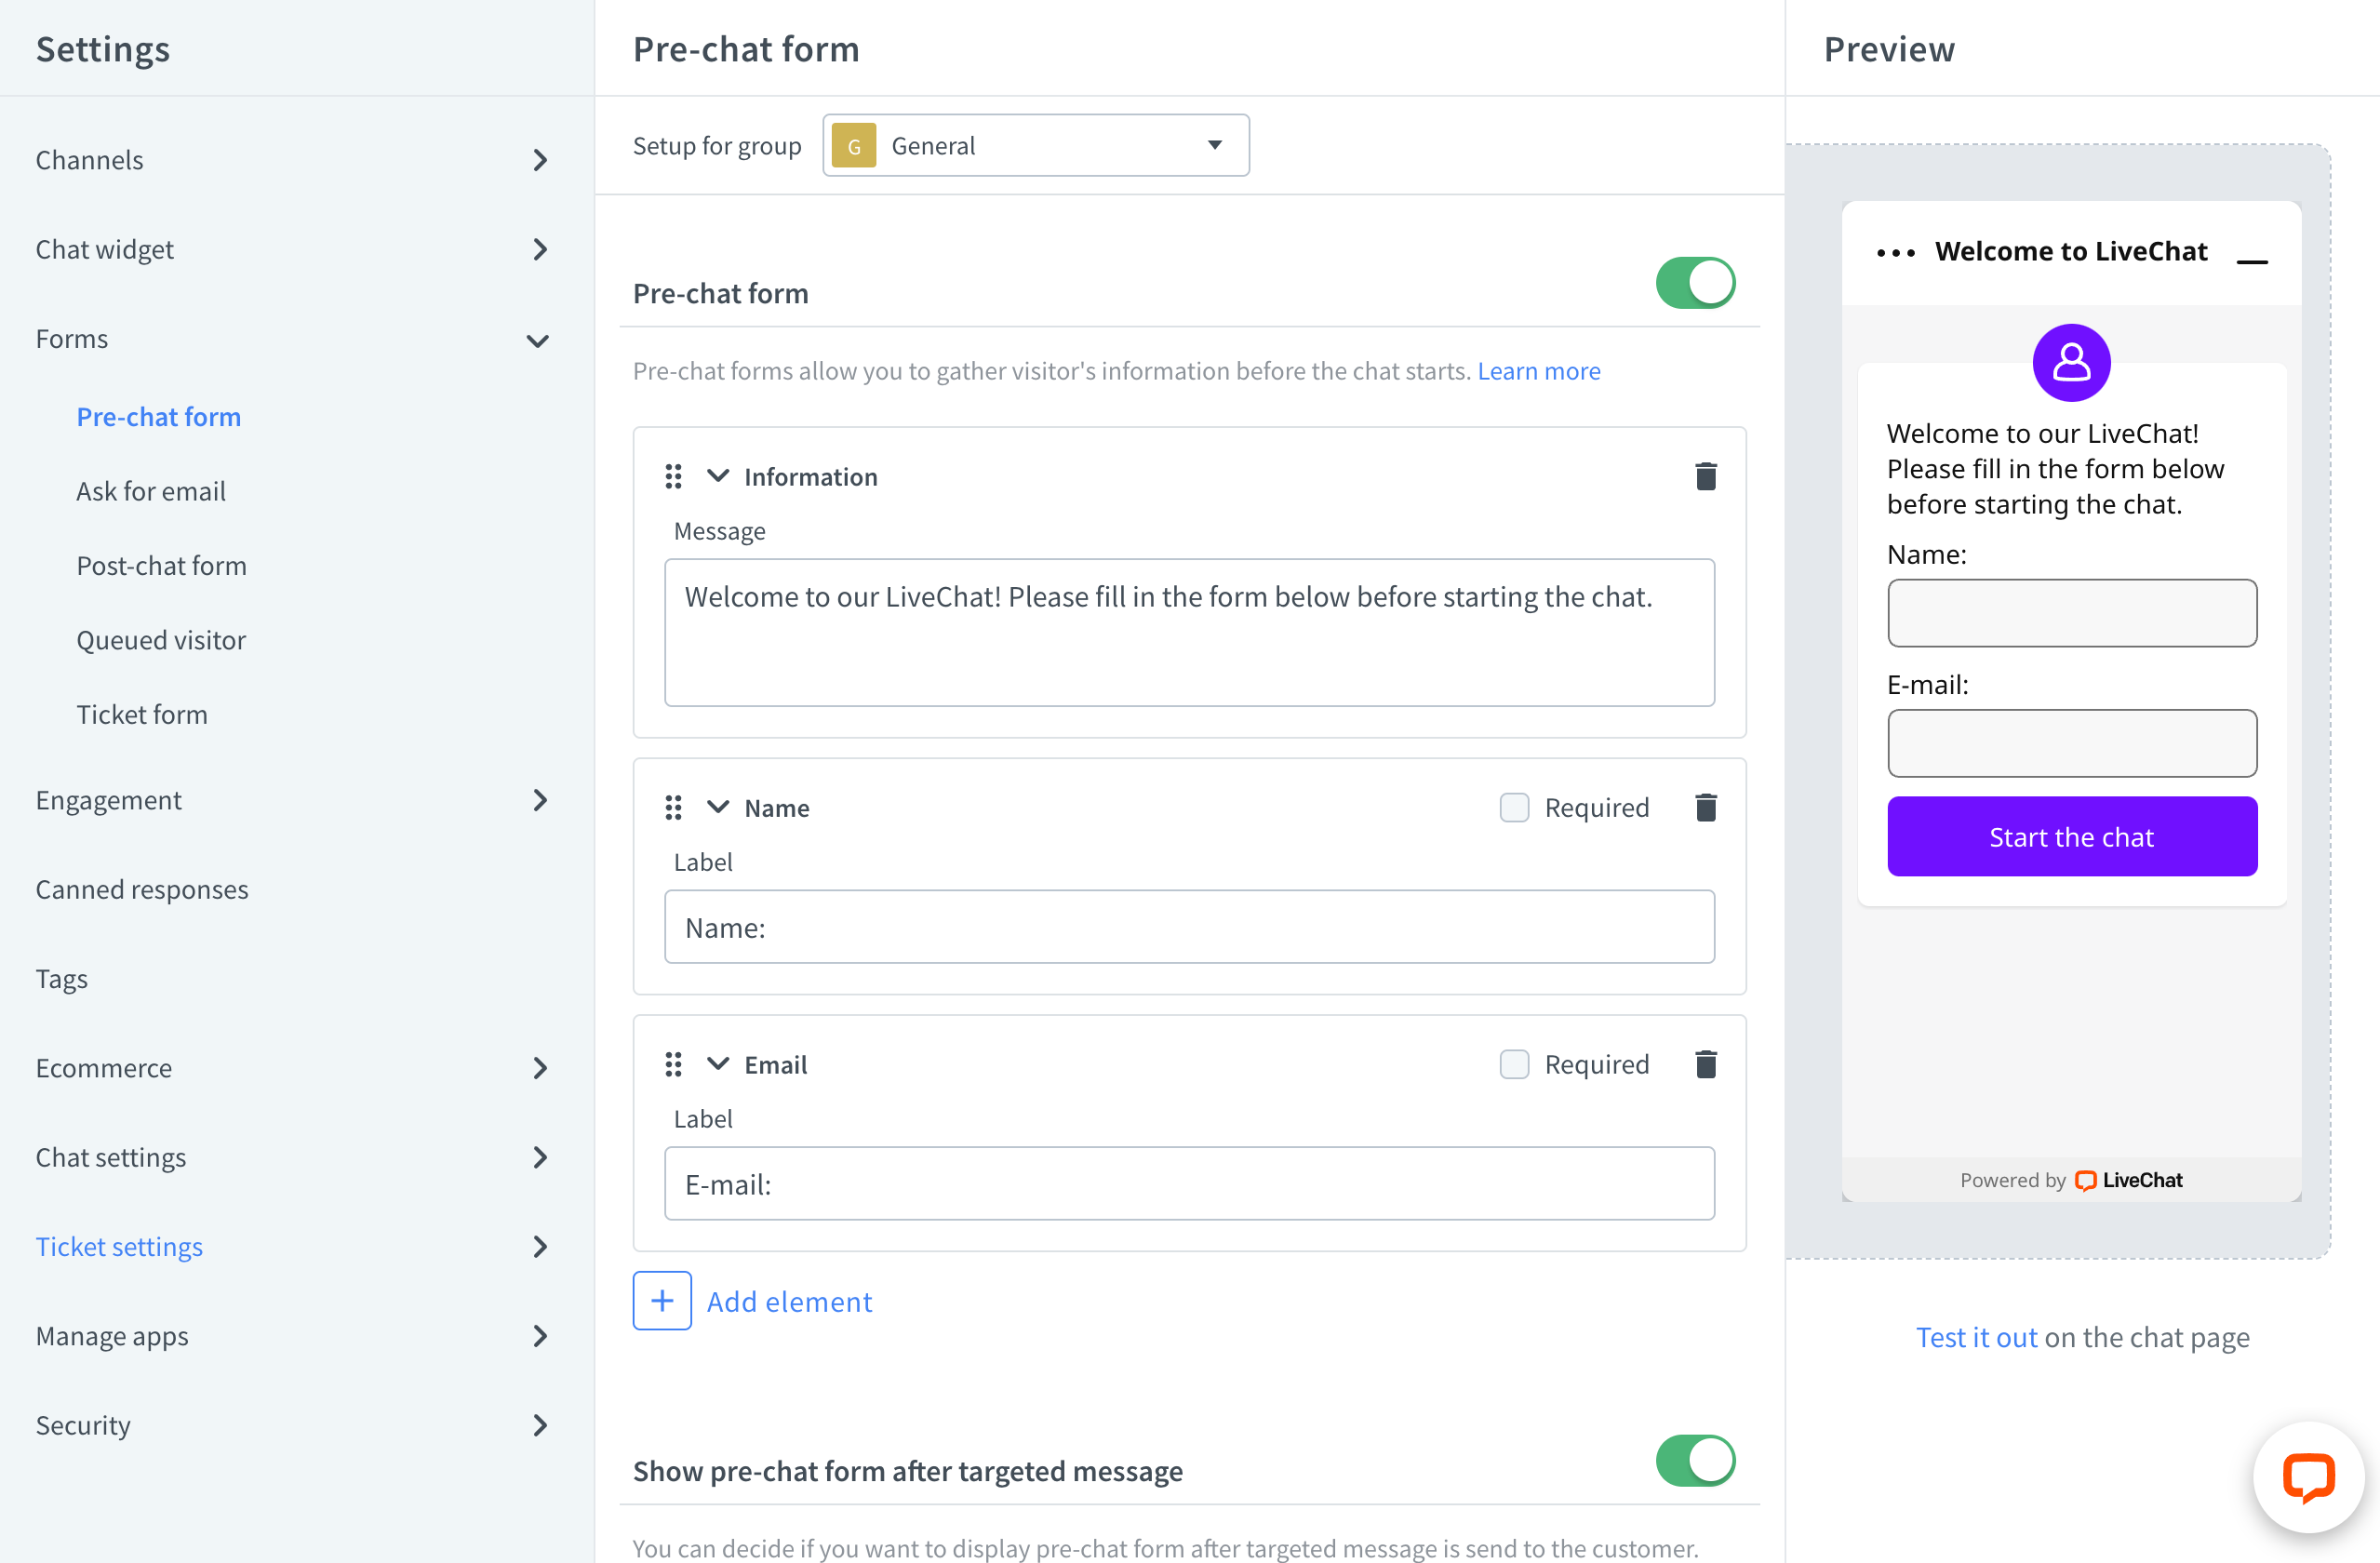
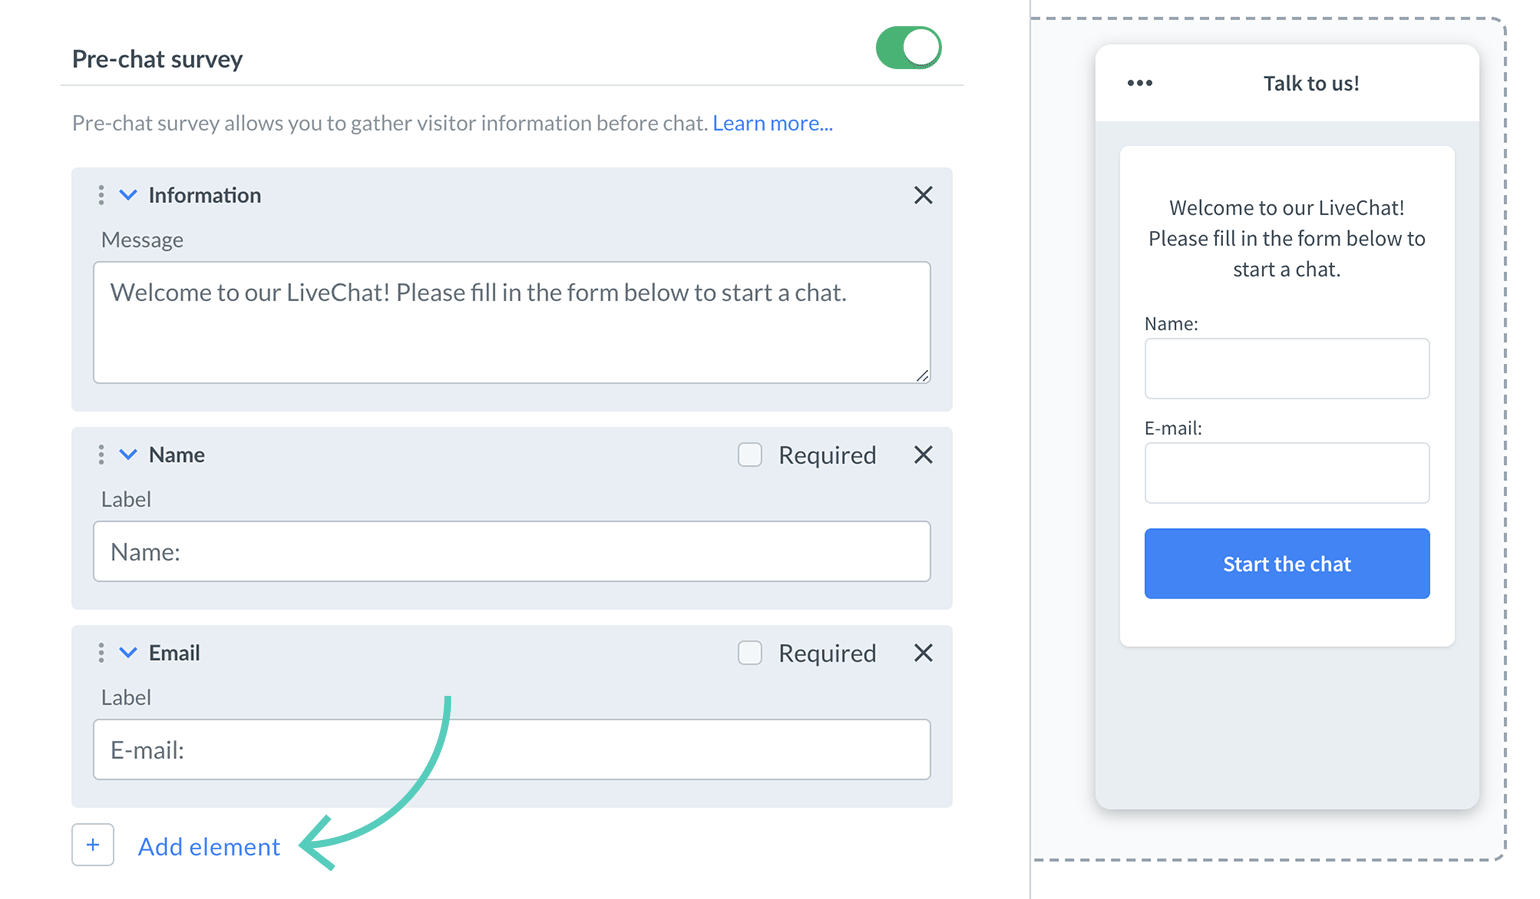
Log in and go to Settings → Forms → Pre-chat form. If pre-chat form is turned off, you need to turn it on by moving the toggle in the top right corner.
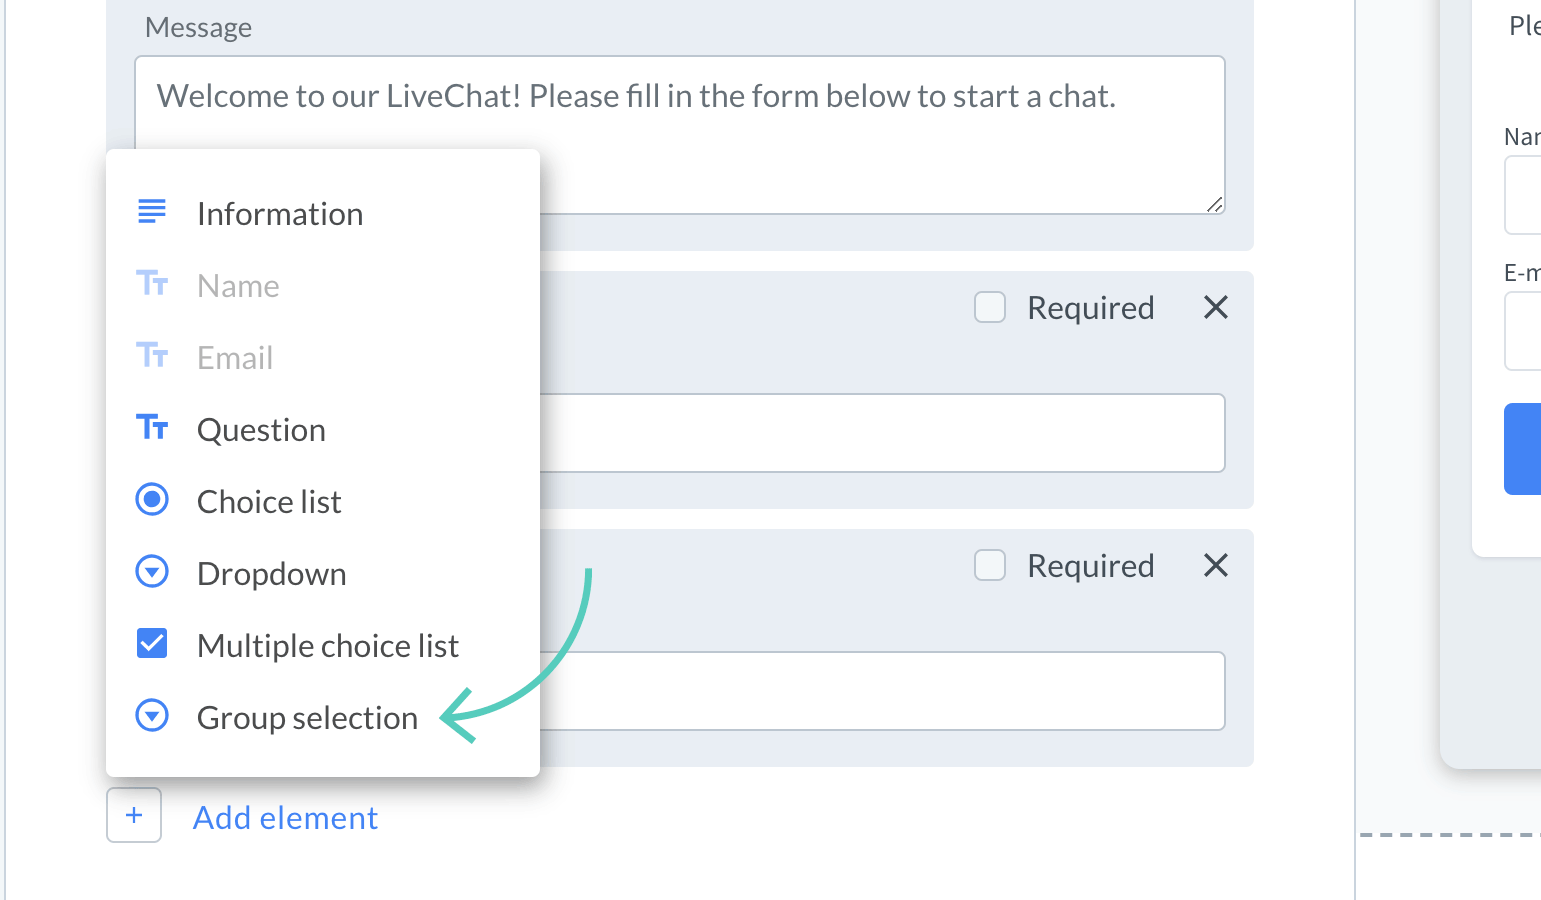
Click on Add element.
Choose Group selection from the list.
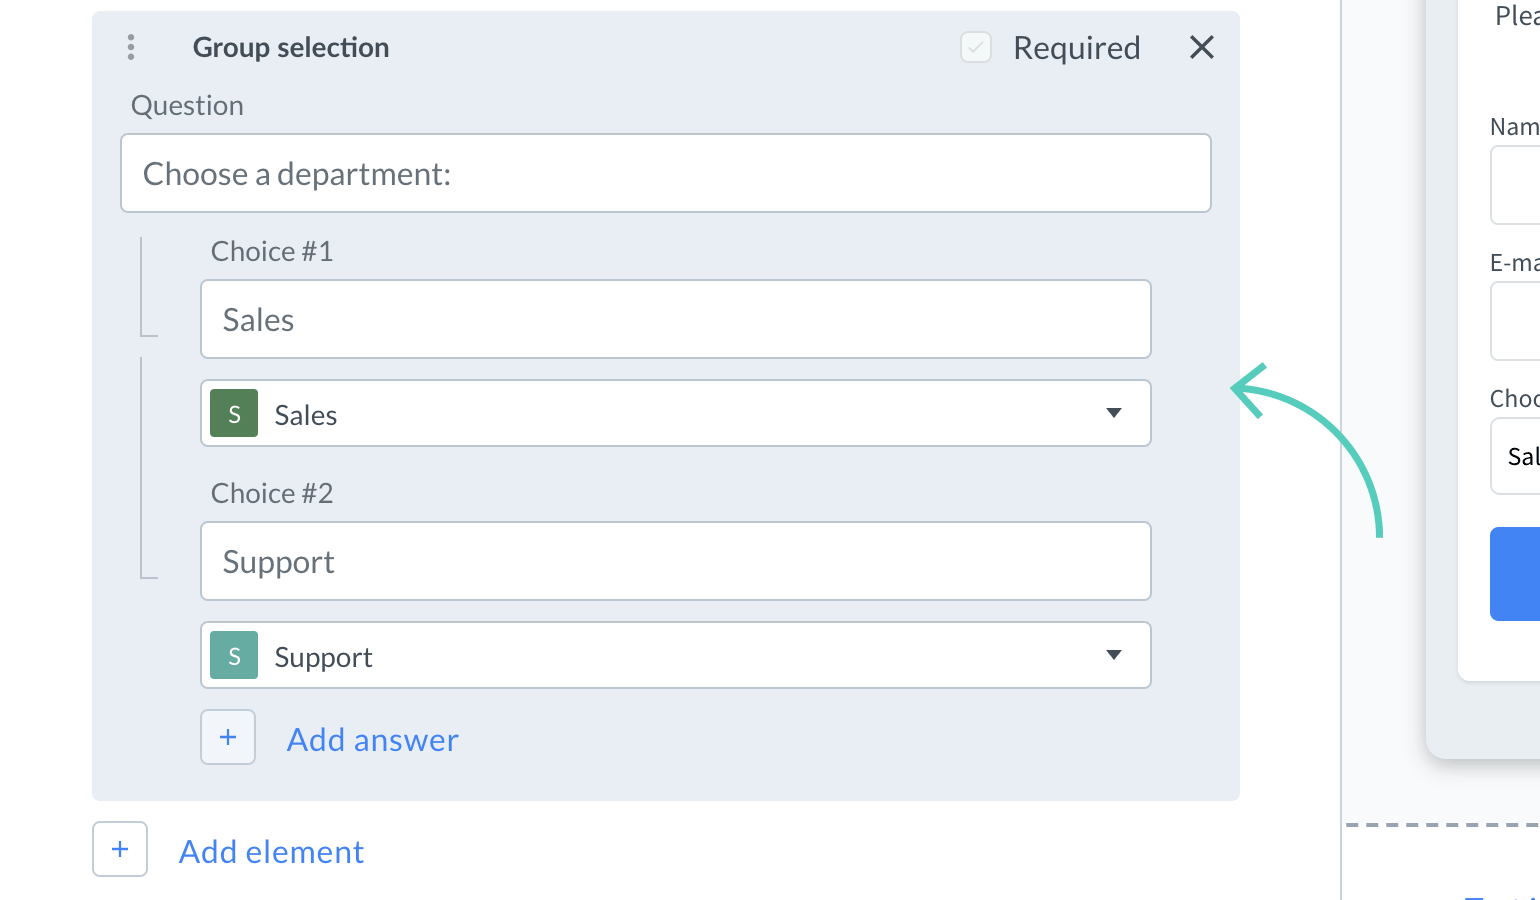
Enter question, choice name, and group assigned to the choice. You can add more choices if needed.
When you are done, click on Save changes to finalize the setup.
Now, your site’s visitors will be able to choose a department at the beginning of every chat.
Note that your visitor will be connected with a member of the group selected in the pre-chat form according to routing rules. But even if the chosen group has different settings than the one in which the chat has started, chat look and language of the widget will not change. That’s because the settings loaded with a tracking code at the start cannot be force-refreshed after the form is submitted.
Handling multiple businesses with LiveChat? Bulletproof your setup with audits, training sessions, health checks and other professional services.
Handling multiple businesses with LiveChat? Bulletproof your setup with audits, training sessions, health checks and other professional services.
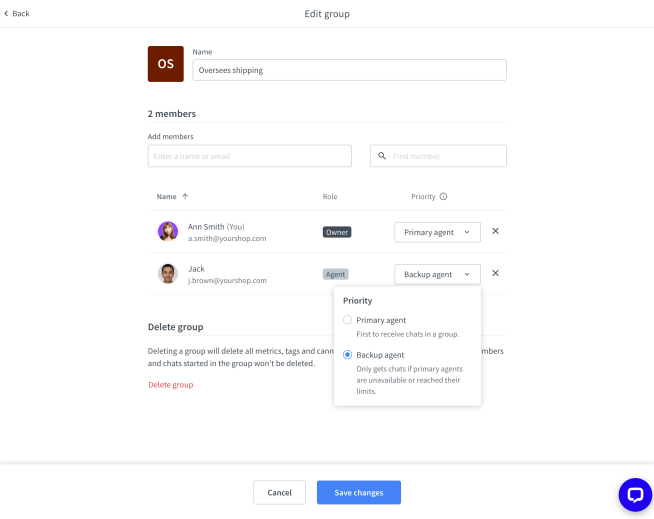
Agent priority in a group
Set agent priority to decide who should get chats first in a group. There are two settings:
Primary agents always get chats first.
Backup agents only get chats if all primary agents are chatting at full capacity.
Setting agent priority is useful when you want to have a back-up for certain groups. For example, your sales team can be a back-up for your support team and help out when there are too many support cases coming in. All you need to do is add sales agents to support group and set them as backup agents.
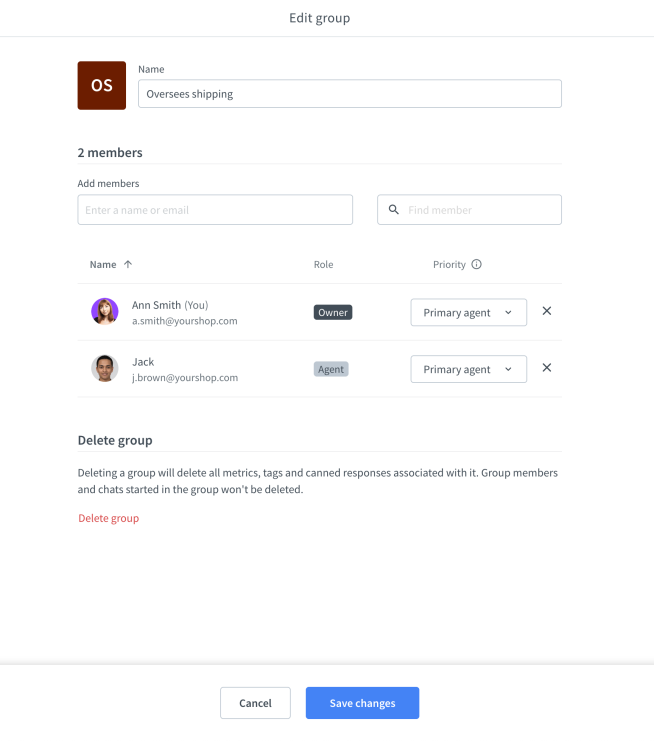
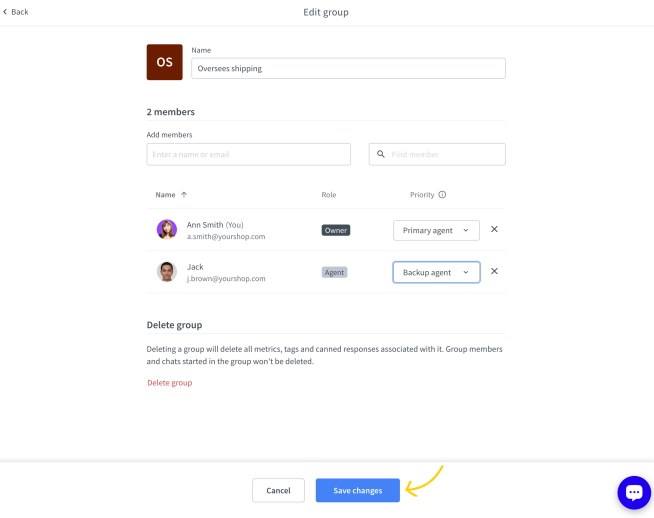
Change agent priority in a group
1
First, go to Team>Groups and select the group to edit. Double-click or select Edit from the drop-down menu.
2
Then, click on the Priority field and select an option from the list.
3
To finalize, select Save changes.
Now, every time a customer starts a chat, it will go to the primary agents of the given group until all of them have reached their concurrent chat limit (the max number of chats they can have at the same time). When this happens, the overflow of the chats will go to the backup agents in this group.
RELATED ARTICLES
Roles: owner, administrator, and agent
Find out what are the differences between owner, administrator, and agent roles on LiveChat license and what privileges do each of them has.