

Getting started with LiveChat? We got your back. In this short tutorial, we’ll take you on a quick tour of the basics.
Create an account and log in
Creating an account is easy. Fill out a 3-step form, and that’s it. You get 14 days to try LiveChat for free and decide if it’s the right tool for you.
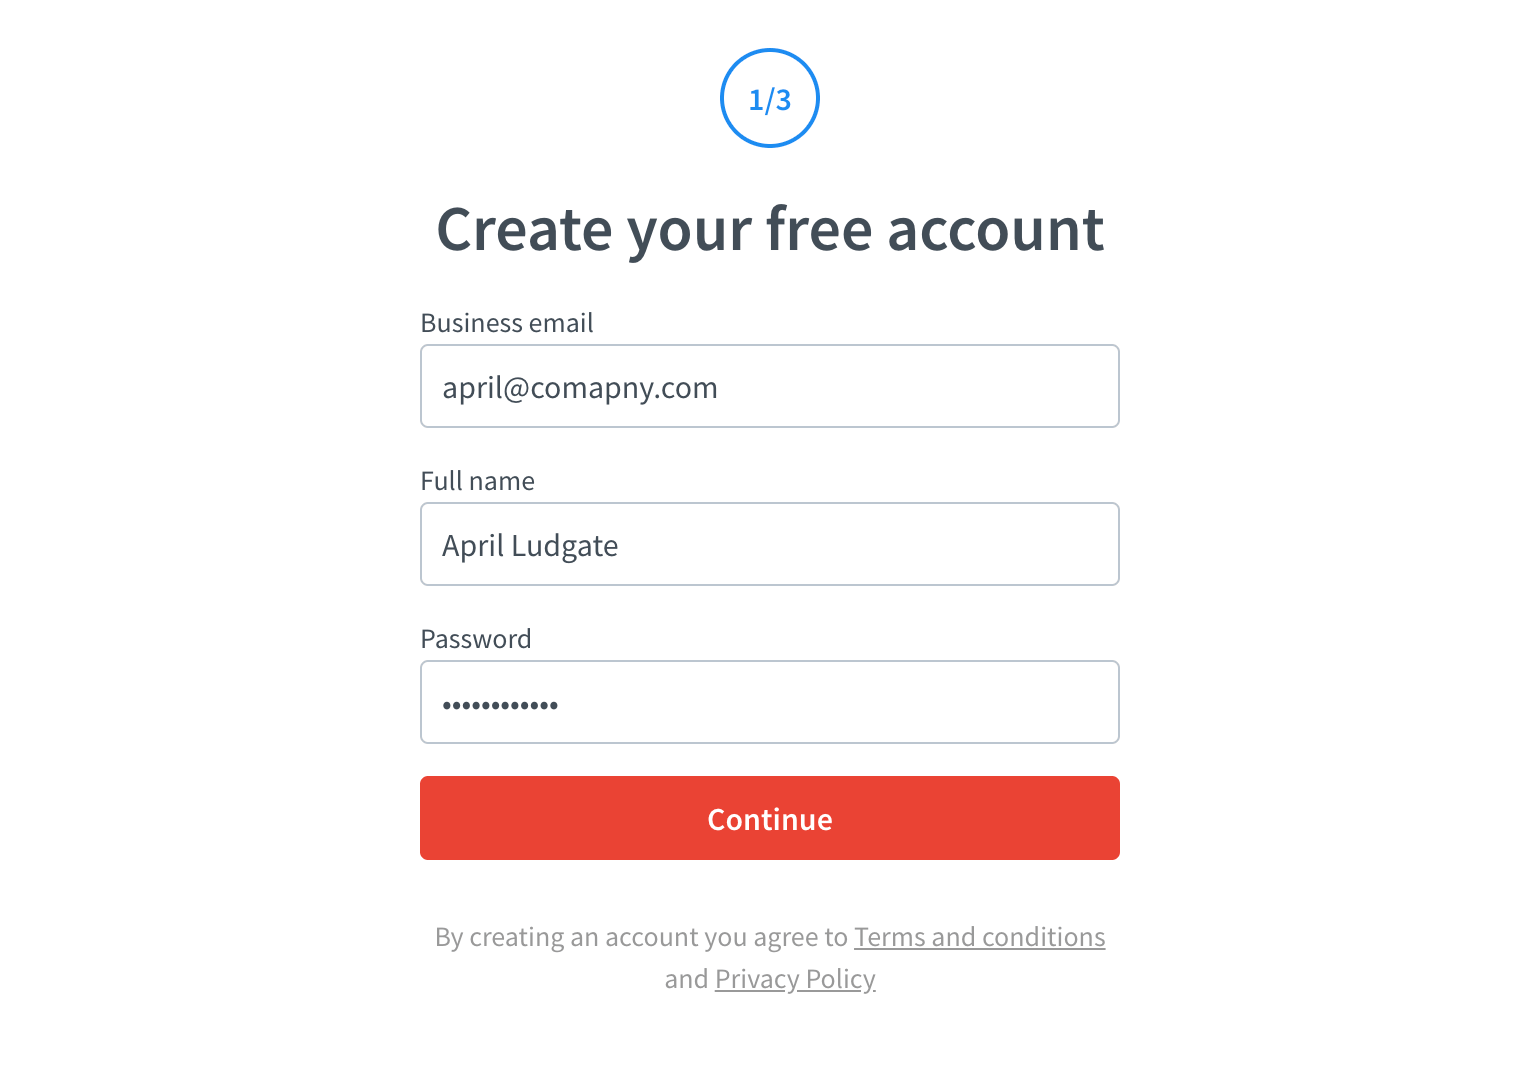
When you create an account, you automatically log in and can start setting things up.
Get to know the app
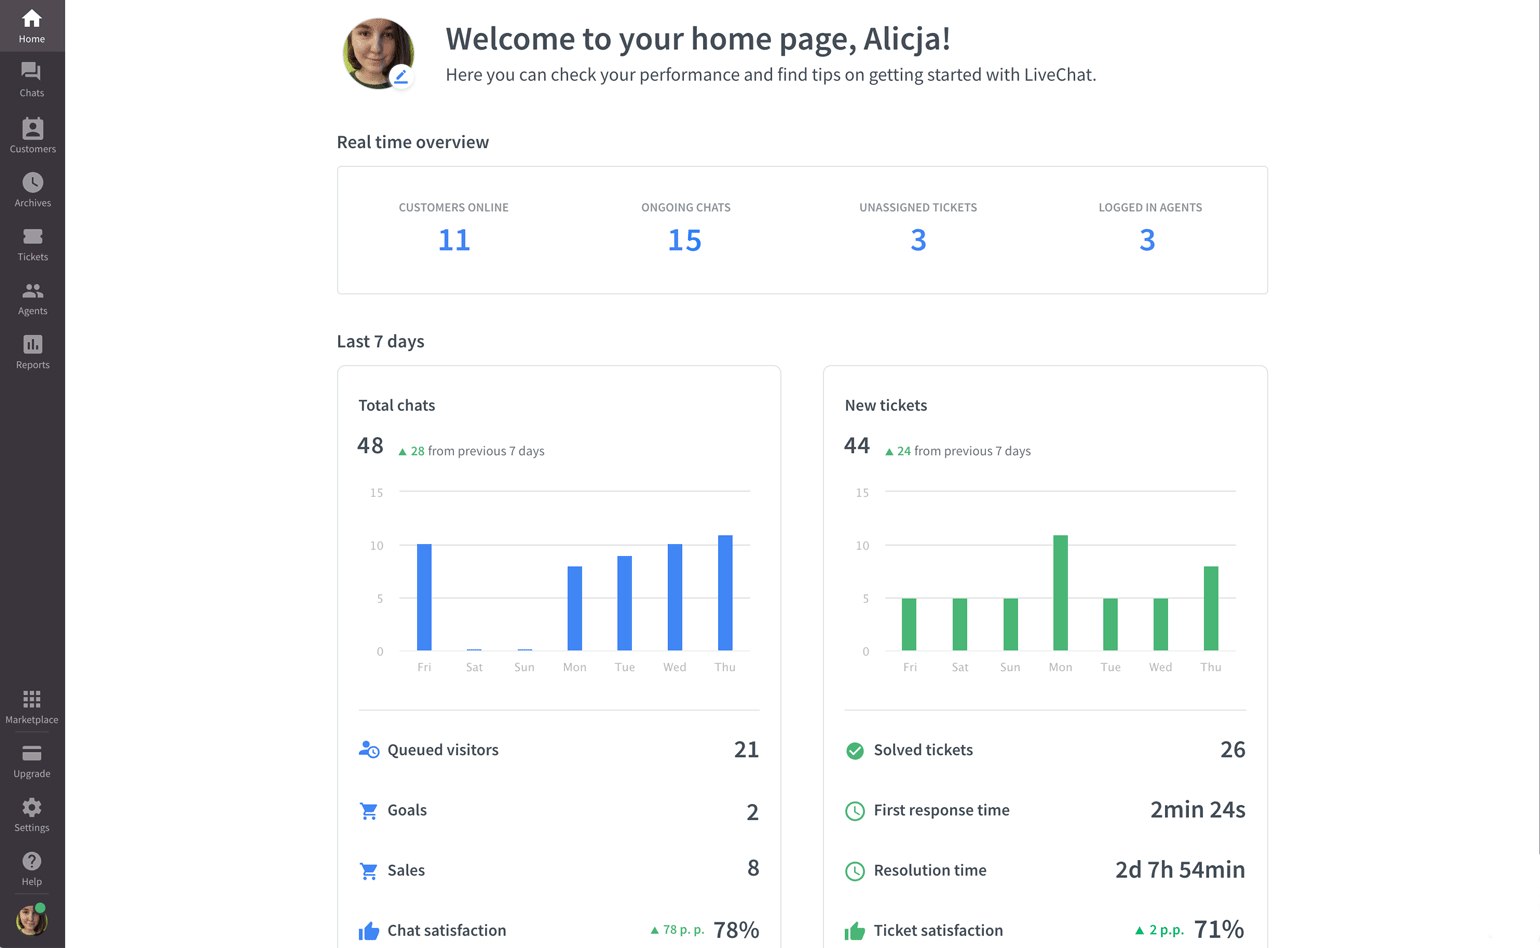
Home page
An overview of what’s going on with your LiveChat account. At first, you’ll get tips on how to get things up and running. When you add the chat widget to your website, you’ll see the most important performance metrics.
View your home page in the LiveChat app.
Chats
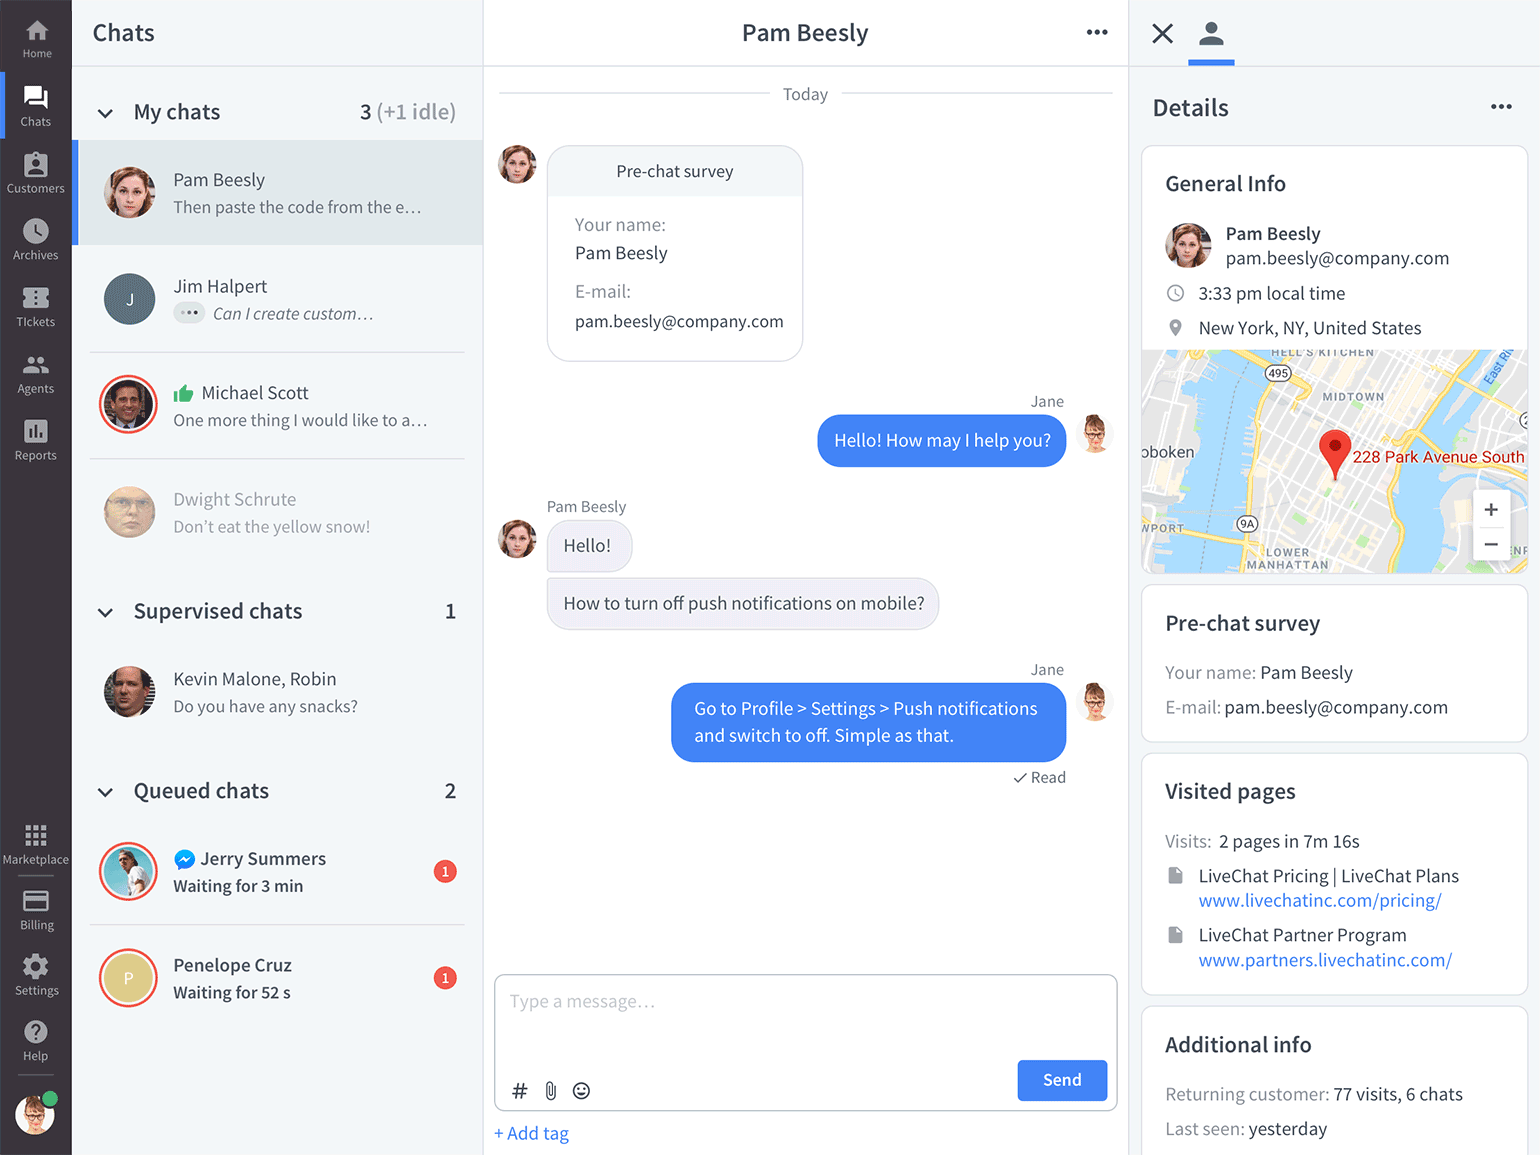
Chats are the real deal. Here, you take care of all ongoing chats: send and receive messages, use apps, check customer details, and many more.
View your Chats in the LiveChat app.
Traffic
Once you’ve added the LiveChat code to your site, you can track all your website visitors. In the Traffic tab of the Engage section, you can encourage them to start a chat by sending a personalized invitation.
View your Traffic in the LiveChat app.

Archives
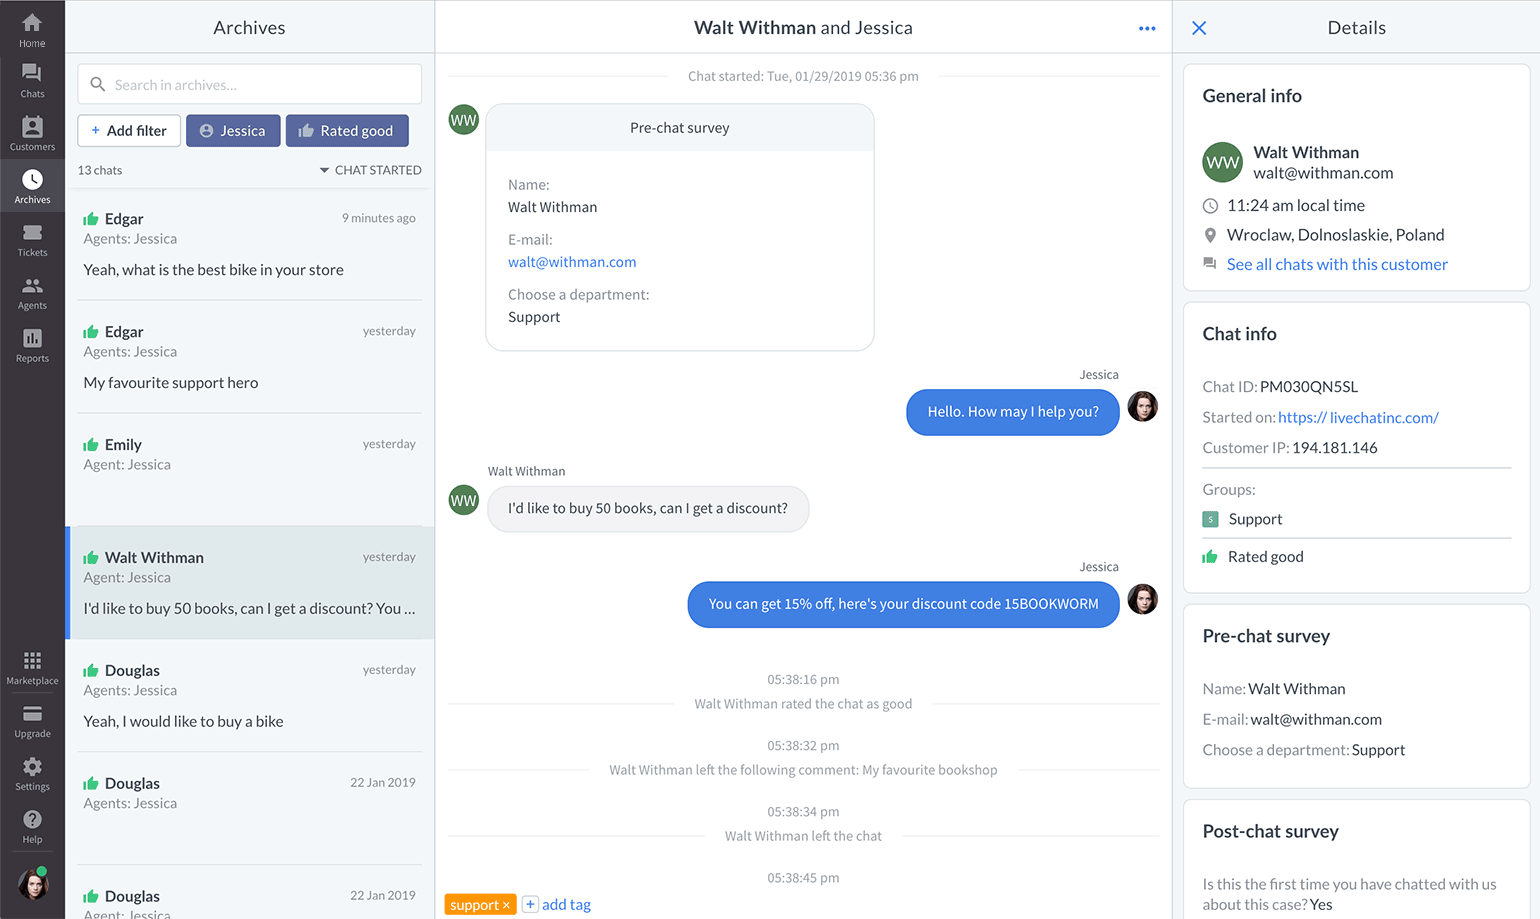
All your past conversations are stored in Archives. Thanks to filtering, you can narrow down the list to see only the chats you need to analyze at the moment.
View your Archives in the LiveChat app.
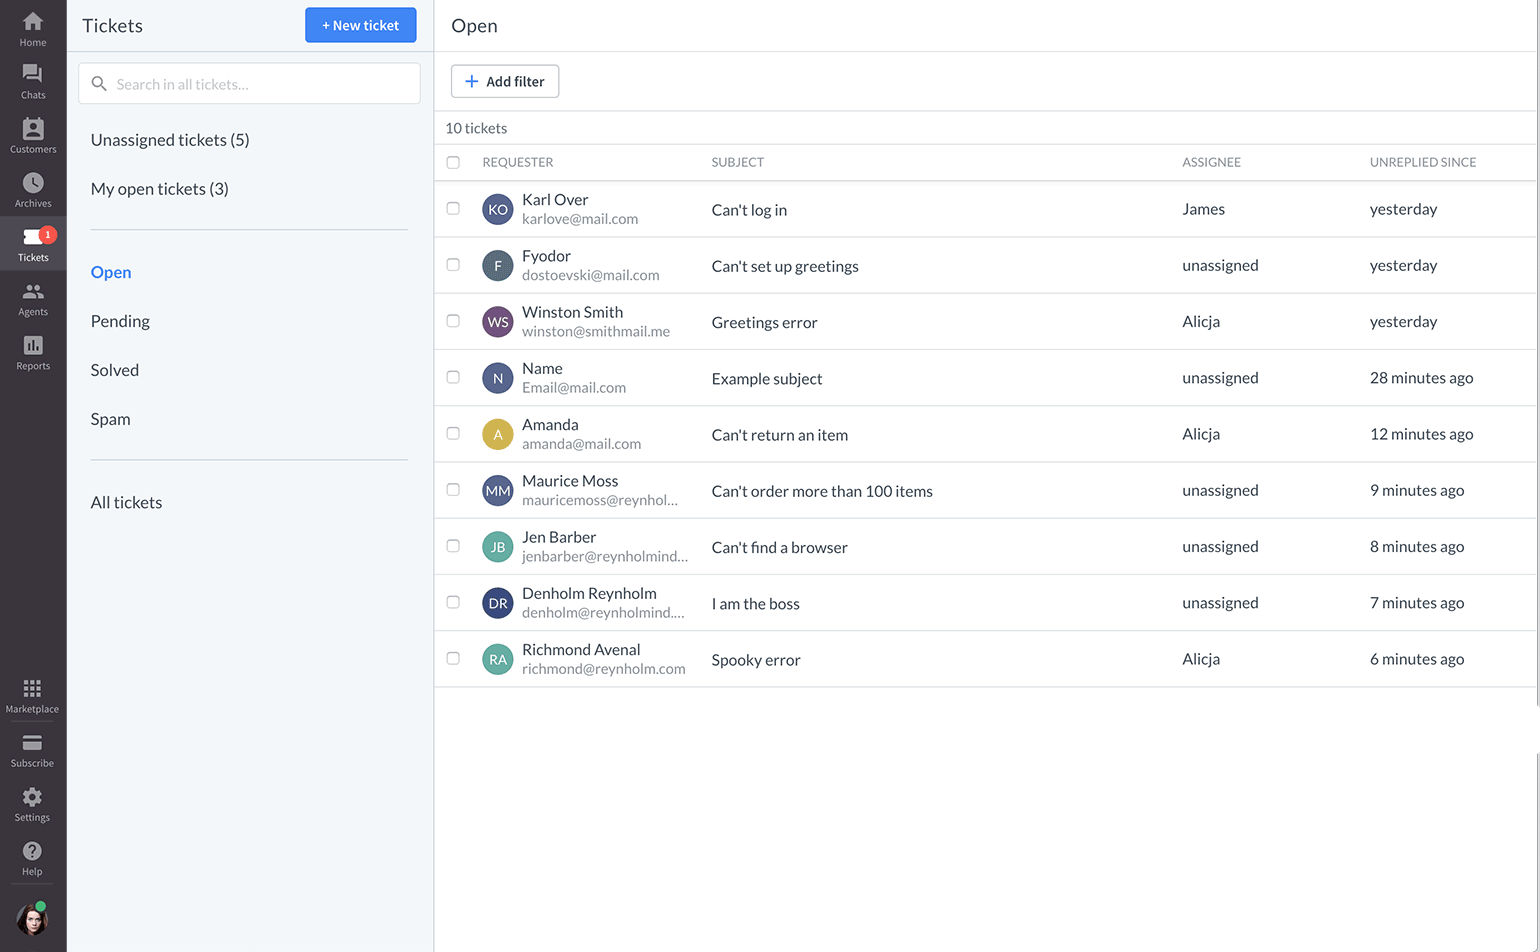
Tickets
LiveChat isn’t only about chats. It can help you handle all of your support emails as well. ‘Tickets’ store messages sent via the chat widget when your team is offline.
View your Tickets in the LiveChat app.
Team
LiveChat is a team sport, so depending on the size of your business, you might need one, a few, or multiple agents. You can manage all their accounts in the Team section.
View your Team in the LiveChat app.

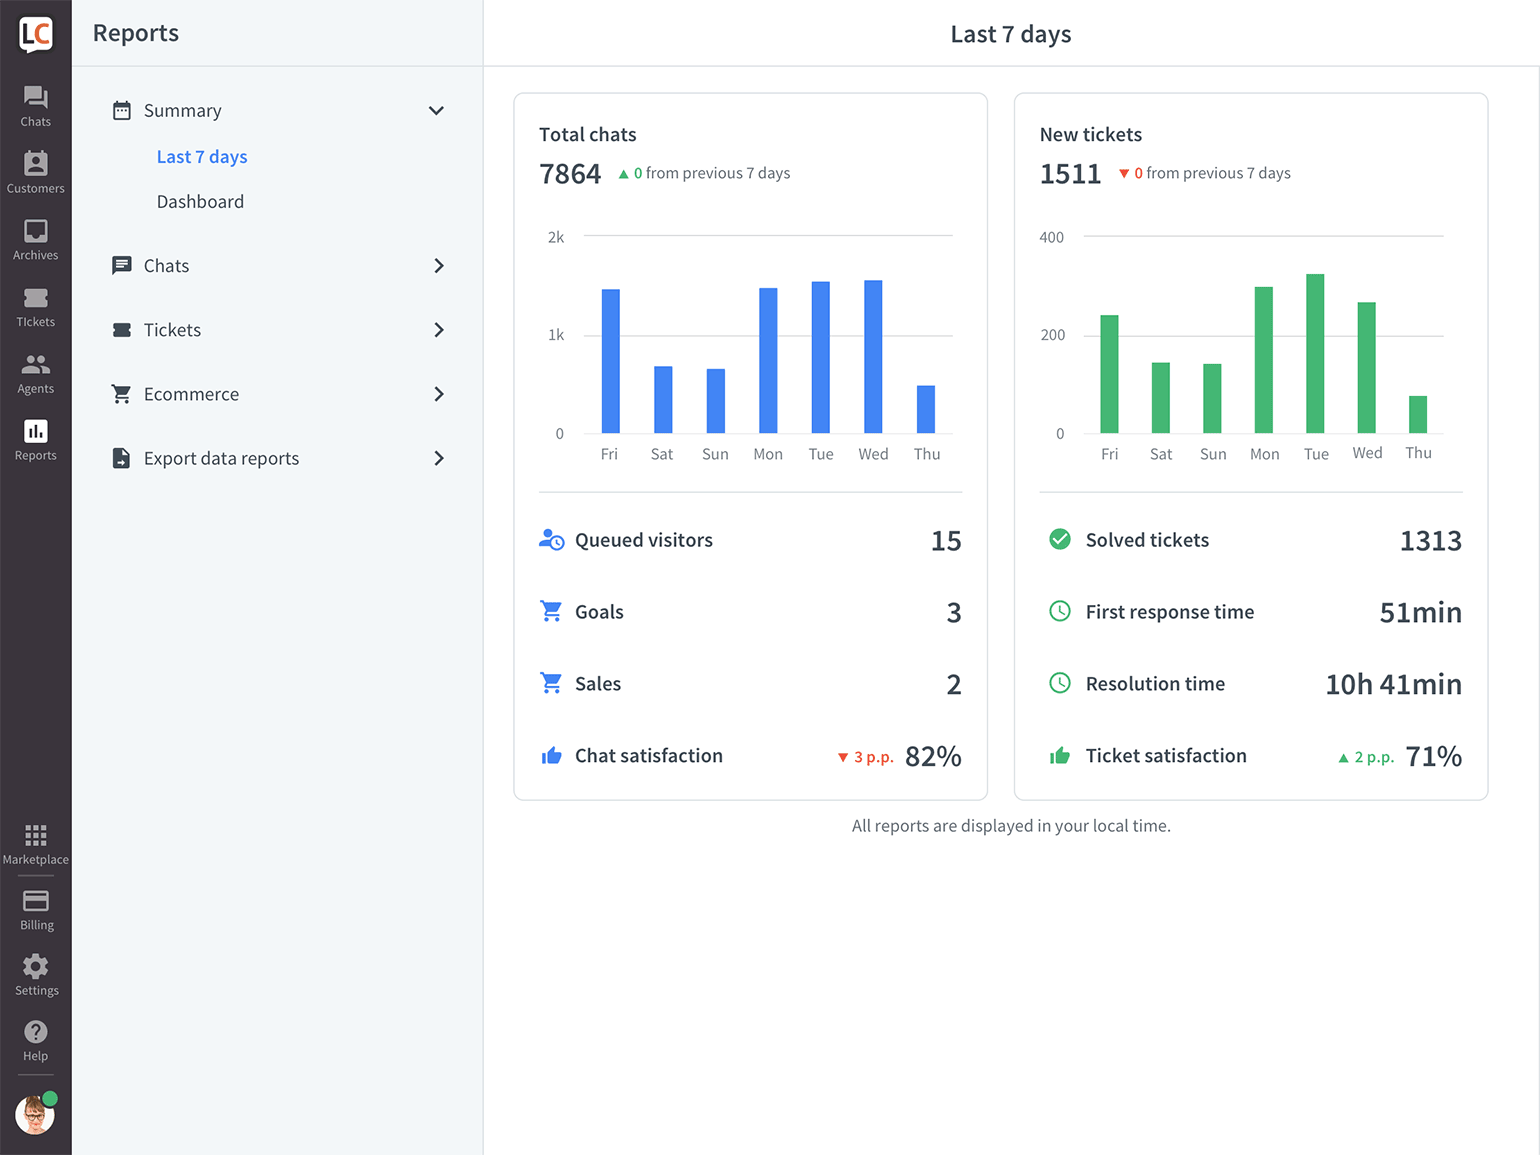
Reports
Once you’ve had a few chats and did some basic optimization to your set-up, check Reports to get a in-depth look into what LiveChat brings for your business and what can be further improved. Among many useful metrics are the number of tickets you get every day, chat availability, solved tickets, greetings conversion, and many more.
View your Reports in the LiveChat app.
Add and customize the chat widget
When you get familiar with LiveChat app, take a look at the chat widget. The chat widget is a little window placed on your website which your customers use to chat with you.
Install the chat widget on your site
To add the chat widget to your website, either add LiveChat code to your site’s source code or use one of our integrations with popular CMSs and ecommerce platforms.
Learn how to install the chat widget on your website.
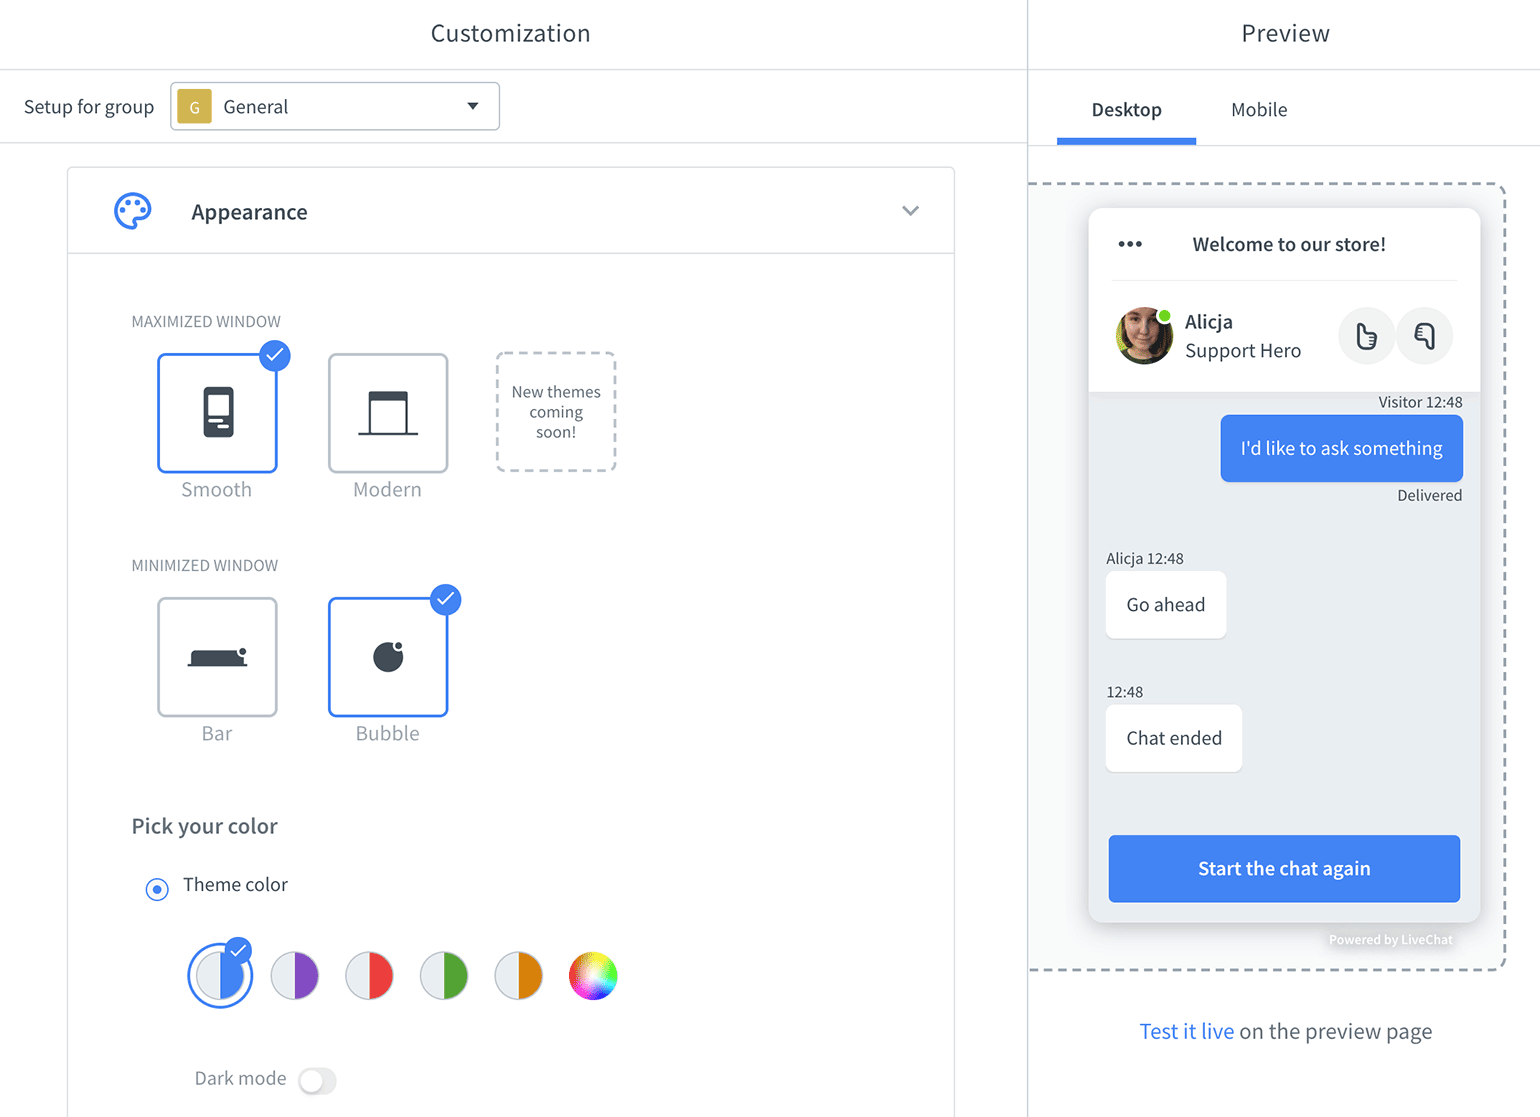
Edit the look of the chat widget
The chat widget should be an integral part of your website and match its branding. You can customize colors, position, visibility, displayed messages, and many more. All with just a few clicks.
Edit your chat widget in the LiveChat app
Change your status to accept chats
You’ve clicked through all the sections, run a few test chats with yourself, and are anxiously waiting for the first real chat… and nothing happens? It’s possible that your status is set to ’not accepting chats’, which means that your customers can’t message you.
Each agent can set their status to either accept chats or don’t accept chats:
- Accept chats—you receive new chats from customers and can use all the other LiveChat features.
- Don’t accept chats—you don’t receive new chats from customers. However, ongoing chats can be continued. Additionally, you are able to use all the other features. For example, change settings, view archives and reports when not accepting chats.
Make sure you always use correct status for your tasks. You can get accidental chats if you switch to Accept chats when you should only track customers and supervise teammates.
You can easily switch the status to ‘accepting chats’ with these steps:


/InitialStatus.png)