Knowing your visitors is key to providing a great personal service. What better way to get to know your customers than to ask for information using chat forms.
With LiveChat software, you can use a pre-chat form to gain useful information about the customer and the case even before a chat starts. And a post-chat form to help you get feedback on your services. Design your online surveys today and find out who your customers are!
In this article
Pre-chat form
Use the pre-chat form at the beginning of each chat to collect relevant information about visitors. Asking users for their name, email or customer ID speeds things up, as you can skip those questions later in the chat. Having such knowledge at hand, you are prepared to provide a better, faster, and more personalized service.

The shorter you make the path between customers and their destinations, the better results you’ll get from your chats. Set up your online surveys with the LiveChat application and see for yourself!
How to turn on pre-chat form
Turning on this online survey is very easy. All you need to do is go to Settings → Forms → Pre-chat form. Then, turn on the switch at the top of the section and confirm by hitting Save changes.

Customize the pre-chat form
Think what info would be most useful during a chat and then ask for it in the form. You can add as many fields as you like, but the more fields you add, and make required, the less likely people are to chat with you. Three-liners requesting name, email, and a short description of the inquiry work in most cases. You can use the preview on the right, to see how your survey looks before saving changes.
There are eight types of fields you can add:
- Information - lets you add a short text, it could be, e.g. an introductory message or a description of the pre-chat form.
- Name - collects user’s name (this field can be used only once in a form).
- Email - collects user’s e-mail (this field can be used only once in a form).
- Question - collects short, open-ended answers.
- Choice list - lets your visitors select one answer from a defined list of choices.
- Dropdown - allows users to choose one answer from a list of choices presented in a dropdown menu.
- Multiple choice list - lets your visitors select more than one answer from a defined list of choices.
- Group selection - allows visitors to choose which department they want to talk to and automatically routes the conversation to a group assigned to a particular option.
The input fields support rich text formatting. See this article for more details.
How to add a field in the pre-chat form
First things first, head to Settings → Forms → Pre-chat form. Then, follow these steps:
- Click on + Add element.

- Choose a field type you want to add.

- Fill in the labels. Take a look at the preview on the right, to see if you are happy with the changes.

- Once you are finished, click on the Save changes button.

How to change the order of fields in the pre-chat form
Head to Settings → Forms → Pre-chat form. To reorder, simply drag and drop fields. Remember to hit Save changes when you are finished.

How to delete a field in the pre-chat form
Head to Settings → Forms → Pre-chat form. To delete a field, simply click on the x in the top right corner of the field. Remember to hit Save changes when you are finished.

How to make a field required in the pre-chat form
Head to Settings → Forms → Pre-chat form. To make a field required, check the Required box in the top right corner of a field. Remember to hit Save changes when you are finished.

Making the pre-chat survey fields required can significantly increase the quality of your chats by limiting the number of accidental visitors.
Pre-chat department (group) routing
Having several departments, such as sales or support, you can use the pre-chat form for smart routing. Let your customers choose whom they need to talk to, to avoid delays and transfers between departments.
In order to let visitors choose a particular agent or group, you need to add a Group selection field in your pre-chat survey. Read more about groups.

Pre-chat form after campaigns
Pre-chat forms can be displayed after campaigns - which means your customers are invited to start a chat first and then need to fill in the survey to be able to talk to an agent. Before deciding if you want to use this feature, think of your business goals first.

The pre-chat form after a campaigns works great if you want to collect users’ details. Enable it to get to know your visitors and offer a better-tailored experience. Even though the number of your chats may drop, their quality is bound to be higher.
On the other hand, no pre-chat survey means fewer barriers. Disable the pre-chat form after campaigns if you want your chat to be more accessible to your visitors. It is best to try both approaches to see which works best for your business.
How to turn on pre-chat form after a campaign
Log into the LiveChat application as an Admin or Owner and go to Settings → Chat Forms → Pre-chat form. Turn on the Show pre-chat form after campaigns switch. You will find it in the bottom right corner. Rember to hit Save changes after.

Prepare your Pre-chat form for General Data Protection Regulation
General Data Protection Regulation is here to stay! As we know how important it is to take care of your customers’ privacy, we prepared a few ready-made data protection consents and clauses that you can use in your Pre-chat form. They will inform your customers about what data collection you are performing. They will also make sure that your pre-chat survey is GDPR compatible.
How to create a data protection consent field in pre-chat form
First, sign into the LiveChat account, go to Settings → Chat Forms → Pre-chat form. Then, follow these steps:
- Click on + Add element.

- Choose Multiple choice list.

- As a question, paste one of the consents available below and type “I agree” as the available answer.

- Mark the field as Required

- Finally, click on Save Changes button to apply your Data Consent to the Pre-chat form.

And here are the ready-made examples of data protection consents and clauses that we’ve prepared for you:
- [Data controller notice]
I understand/acknowledge that the controller of my personal data is [your company name] with its registered office in [your business address]. I understand/acknowledge that my personal data shall be processed and transmitted in accordance with the General Data Protection Regulation (GDPR).- [Data controller notice]
I understand/acknowledge that the controller of my personal data is [your company name] with its registered office in [your business address]. I understand/acknowledge that my personal data shall be processed and transmitted in accordance with the Regulation (EU) 2016/679 of the European Parliament and of the Council of 27 April 2016 on the protection of natural persons with regard to the processing of personal data and on the free movement of such data and repealing Directive 95/46/EC (The General Data Protection Regulation - GDPR).- [Data processing consent, purpose, retention period, revocation]
I agree for my personal data, provided via chat, to be processed by [your company name] for the purposes of providing support via chat. I agree for my personal data to be processed for the time [e.g. needed to carry out the service]. I understand that the consent may be revoked by sending an email at: [your business email/your data protection officer’s email].- [Data processing consent, purpose, retention period]
I agree for my personal data, provided via chat, to be processed by [your company name], for the purpose of [specify the purpose of the processing], for the time of [specify the time of processing].- [The data subject’s rights notice]
I acknowledge that I have been informed about the rights I have, in particular, the right to access my personal data, to rectify and delete them, the right to limit the processing, transferring, and to demand the temporary or permanent suspension of the processing, as well as withdrawal of consent for processing and filing a complaint to the supervisory body.- [Consent for entrusting the data]
I agree to transfer my personal data by the data controller to affiliated companies and other entities whose services are used by the data controller while doing business.
You can also link to your full privacy policy in the pre-chat survey. Click on a text area in a chosen field label to find the link formatting option. See this article for more details.

You can read more about how to make your chat GDPR compliant here.
Post-chat form
We also have a post-chat form which is a useful tool to see what customers think about your service. You can let them rate chats or ask them to leave comments. Post chat data collection and satisfaction surveys can become one of the most efficient feedback channels if used properly.

You can use a prefabricated survey or customize it to your needs. Depending on your business profile and the purpose of using live chat software you might need different feedback to make your services better. You can experiment with different questions and types of fields. To see how your customers filled in the post-chat form log into the LiveChat app, go to Archives and filter by Rating or check out Chat forms and Chat satisfaction reports.
How to turn on post-chat form
Turning on the post-chat survey is really easy. All you need to do is go to Settings → Forms → Post-chat form. Then, turn on the switch at the top of the section and confirm by hitting Save changes.

Customize post-chat form
Think what feedback would be most useful to make chats better and then ask for it in the form. You can add as many fields as you like, but the more fields you add, and make required, the less likely people are to leave their feedback. Make it easier for your customers, and use pre-defined choice lists or chat rating so filling in your customer satisfaction survey takes seconds. You can use the preview on the right, to see how your form looks before saving changes.
There are seven types of fields you can add:
- Thank you message - adds a short text (this field can be used only once in a survey);
- Question - collects short, open-ended answers;
- Message - collects long, open-ended answers;
- Choice list - lets your visitors select one answer from a defined list of choices;
- Dropdown - allows users to choose one answer from a list of choices presented in a dropdown menu;
- Multiple choice list - lets your visitors select more than one answer from a defined list of choices;
- Chat rating - lets users rate the chat.
The input fields support rich text formatting. See this article for more details.
How to add a field in the post-chat form
First things first, head to Settings → Forms → Post-chat form. Then, follow these steps:
- Click on + Add element.

- Choose a field type you want to add.

- Fill in the labels. Take a look at the preview on the right, to see if you are happy with the changes.

- Once you are finished, click on the Save changes button.

How to change the order of fields in the post-chat form
Head to Settings → Forms → Post-chat form. To reorder, simply drag and drop fields. Remember to hit Save changes when you are finished.

How to delete a field in the post-chat form
Head to Settings → Chat Forms → Post-chat form. To delete a field, simply click on the x in the top right corner of the field. Remember to hit Save changes when you are finished.

How to make a field required in the post-chat form
Head to Settings → Forms → Post-chat form. To make a field required, check the Required box in the top right corner of a field. Remember to hit Save changes when you are finished.

How to format texts in forms
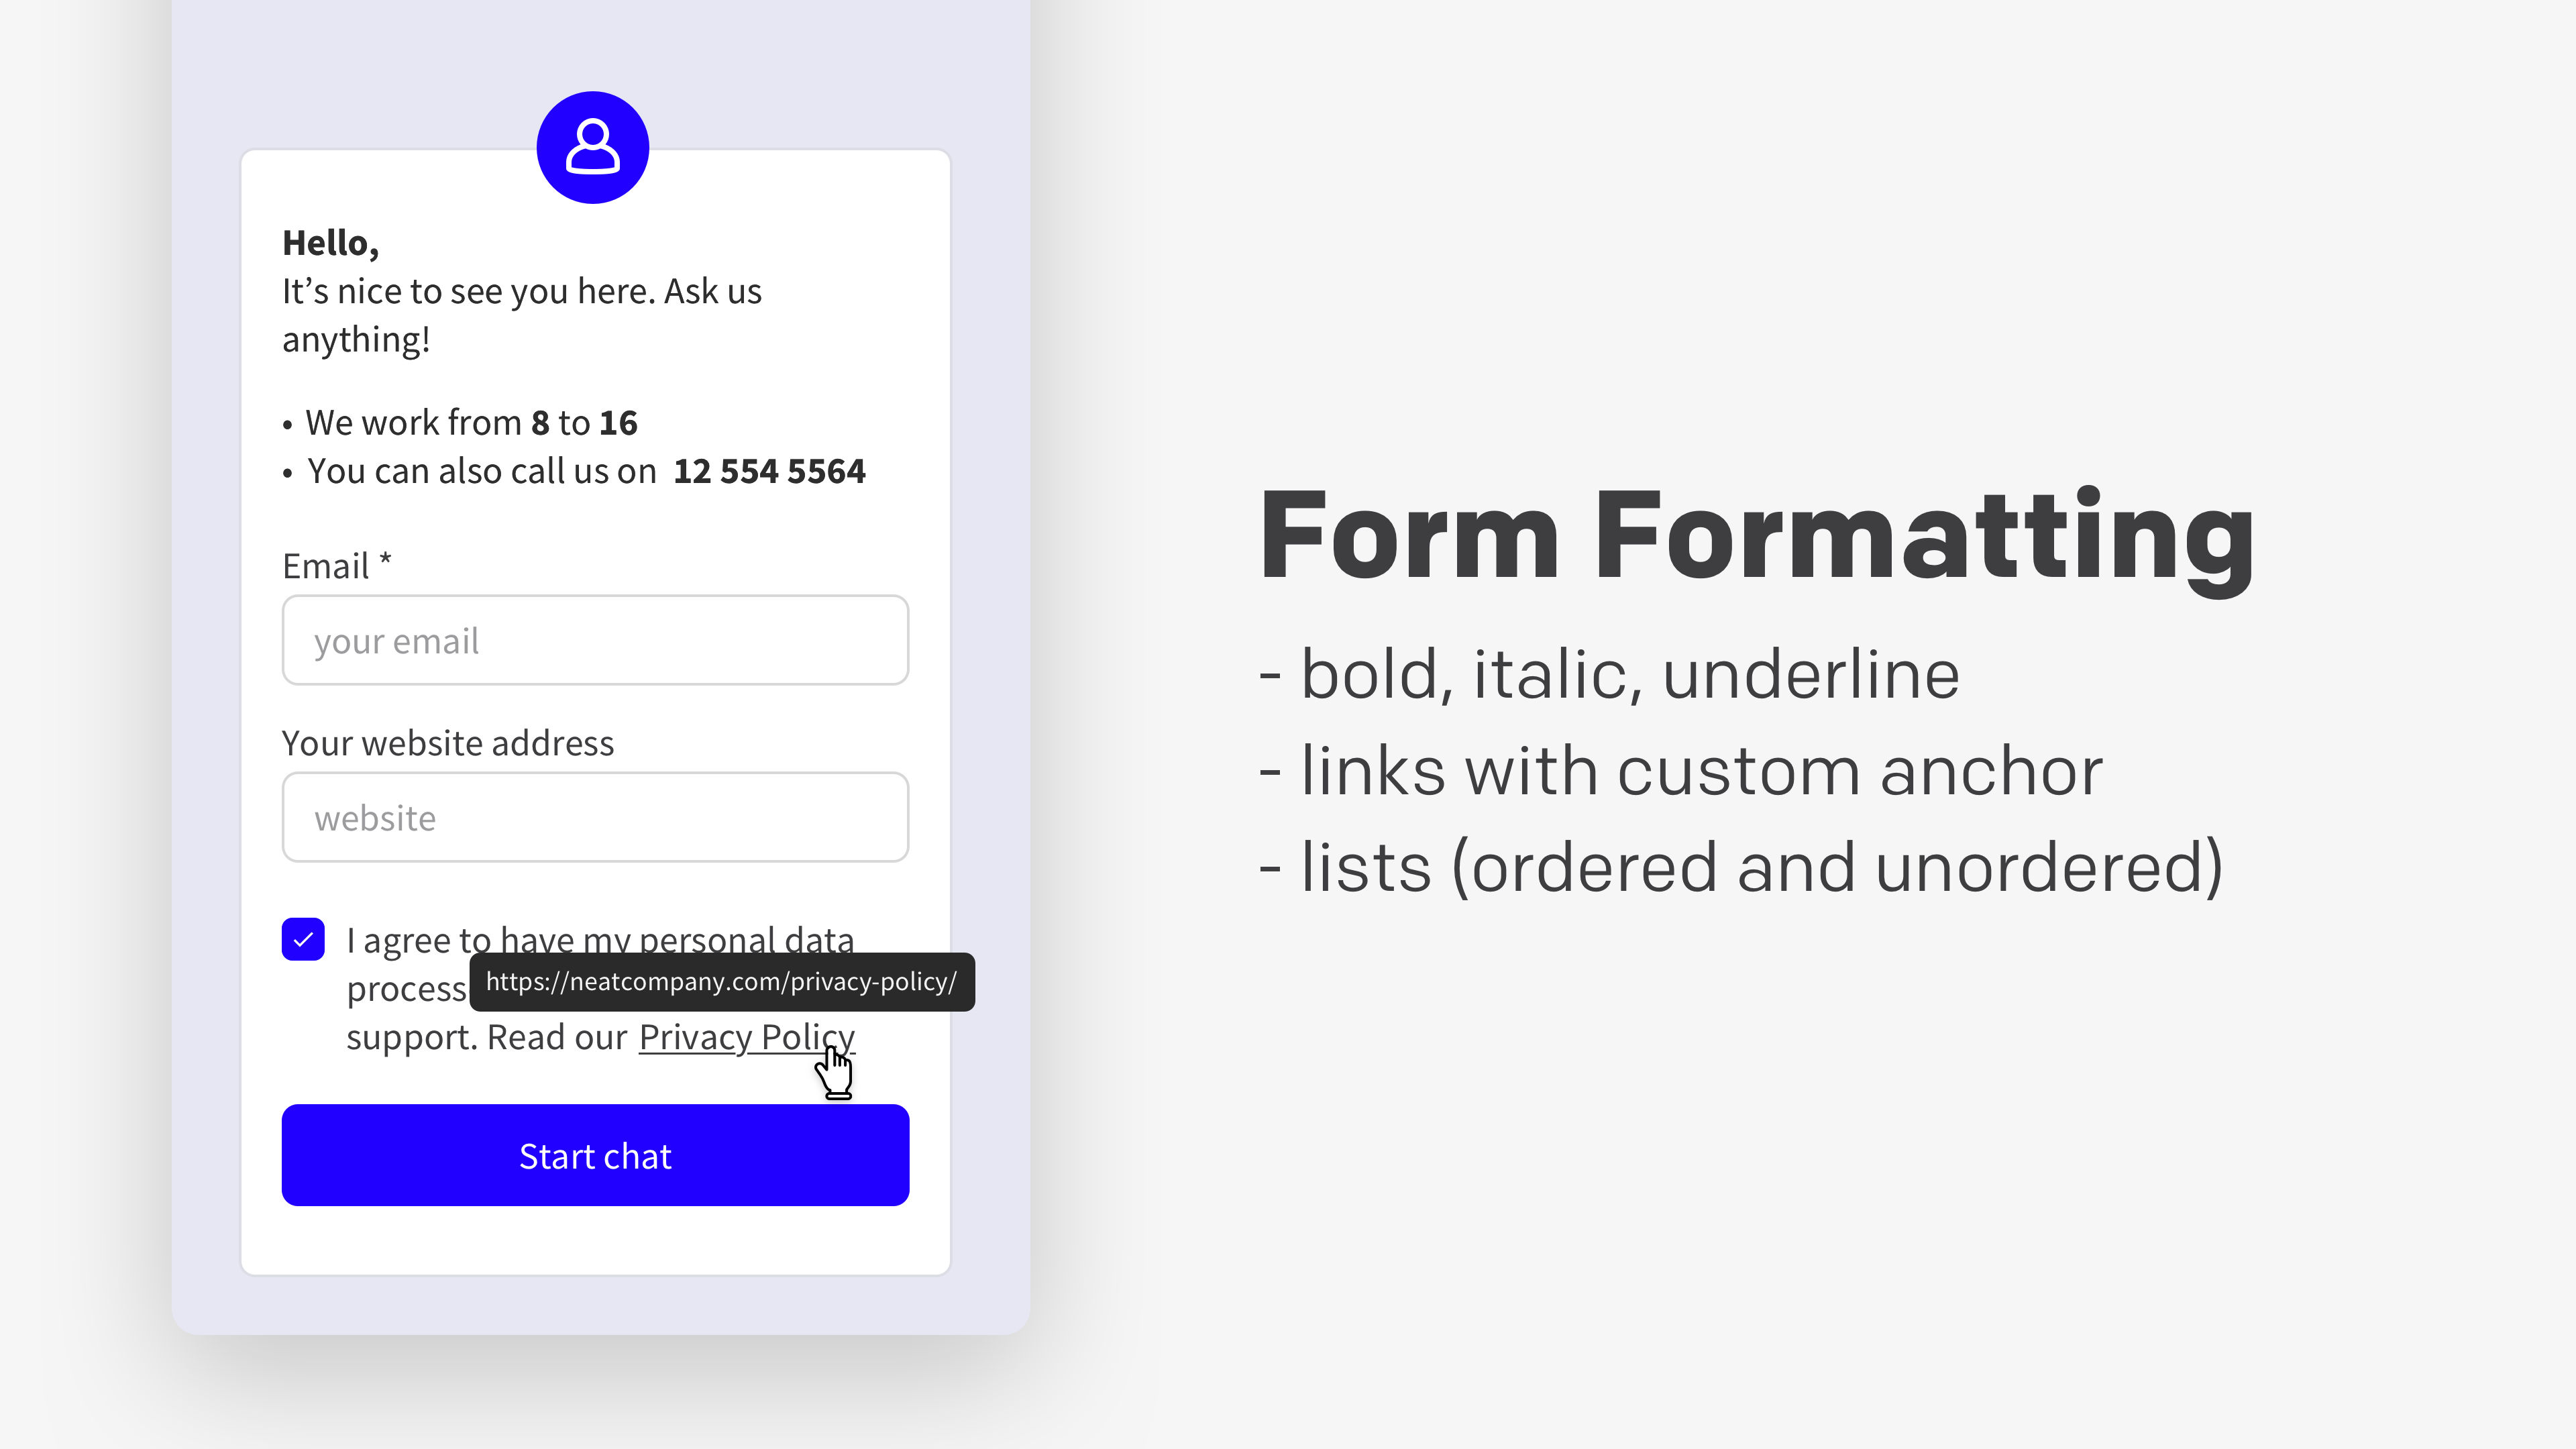
Chat forms offer text formatting. Click on the text area in a chosen field label to see the available formatting options.

Rich text formating
To edit the pre-chat form, the post-chat form, the queued visitor, or the ticket form, log in to the LiveChat app and go to Settings>Forms. Click on an input field to see the available formatting options. Depending on the type of field you’ll be able to use:
- Bold font
- Italics
- Numbered lists
- Bullet points
- Hyperlinks

Markdown
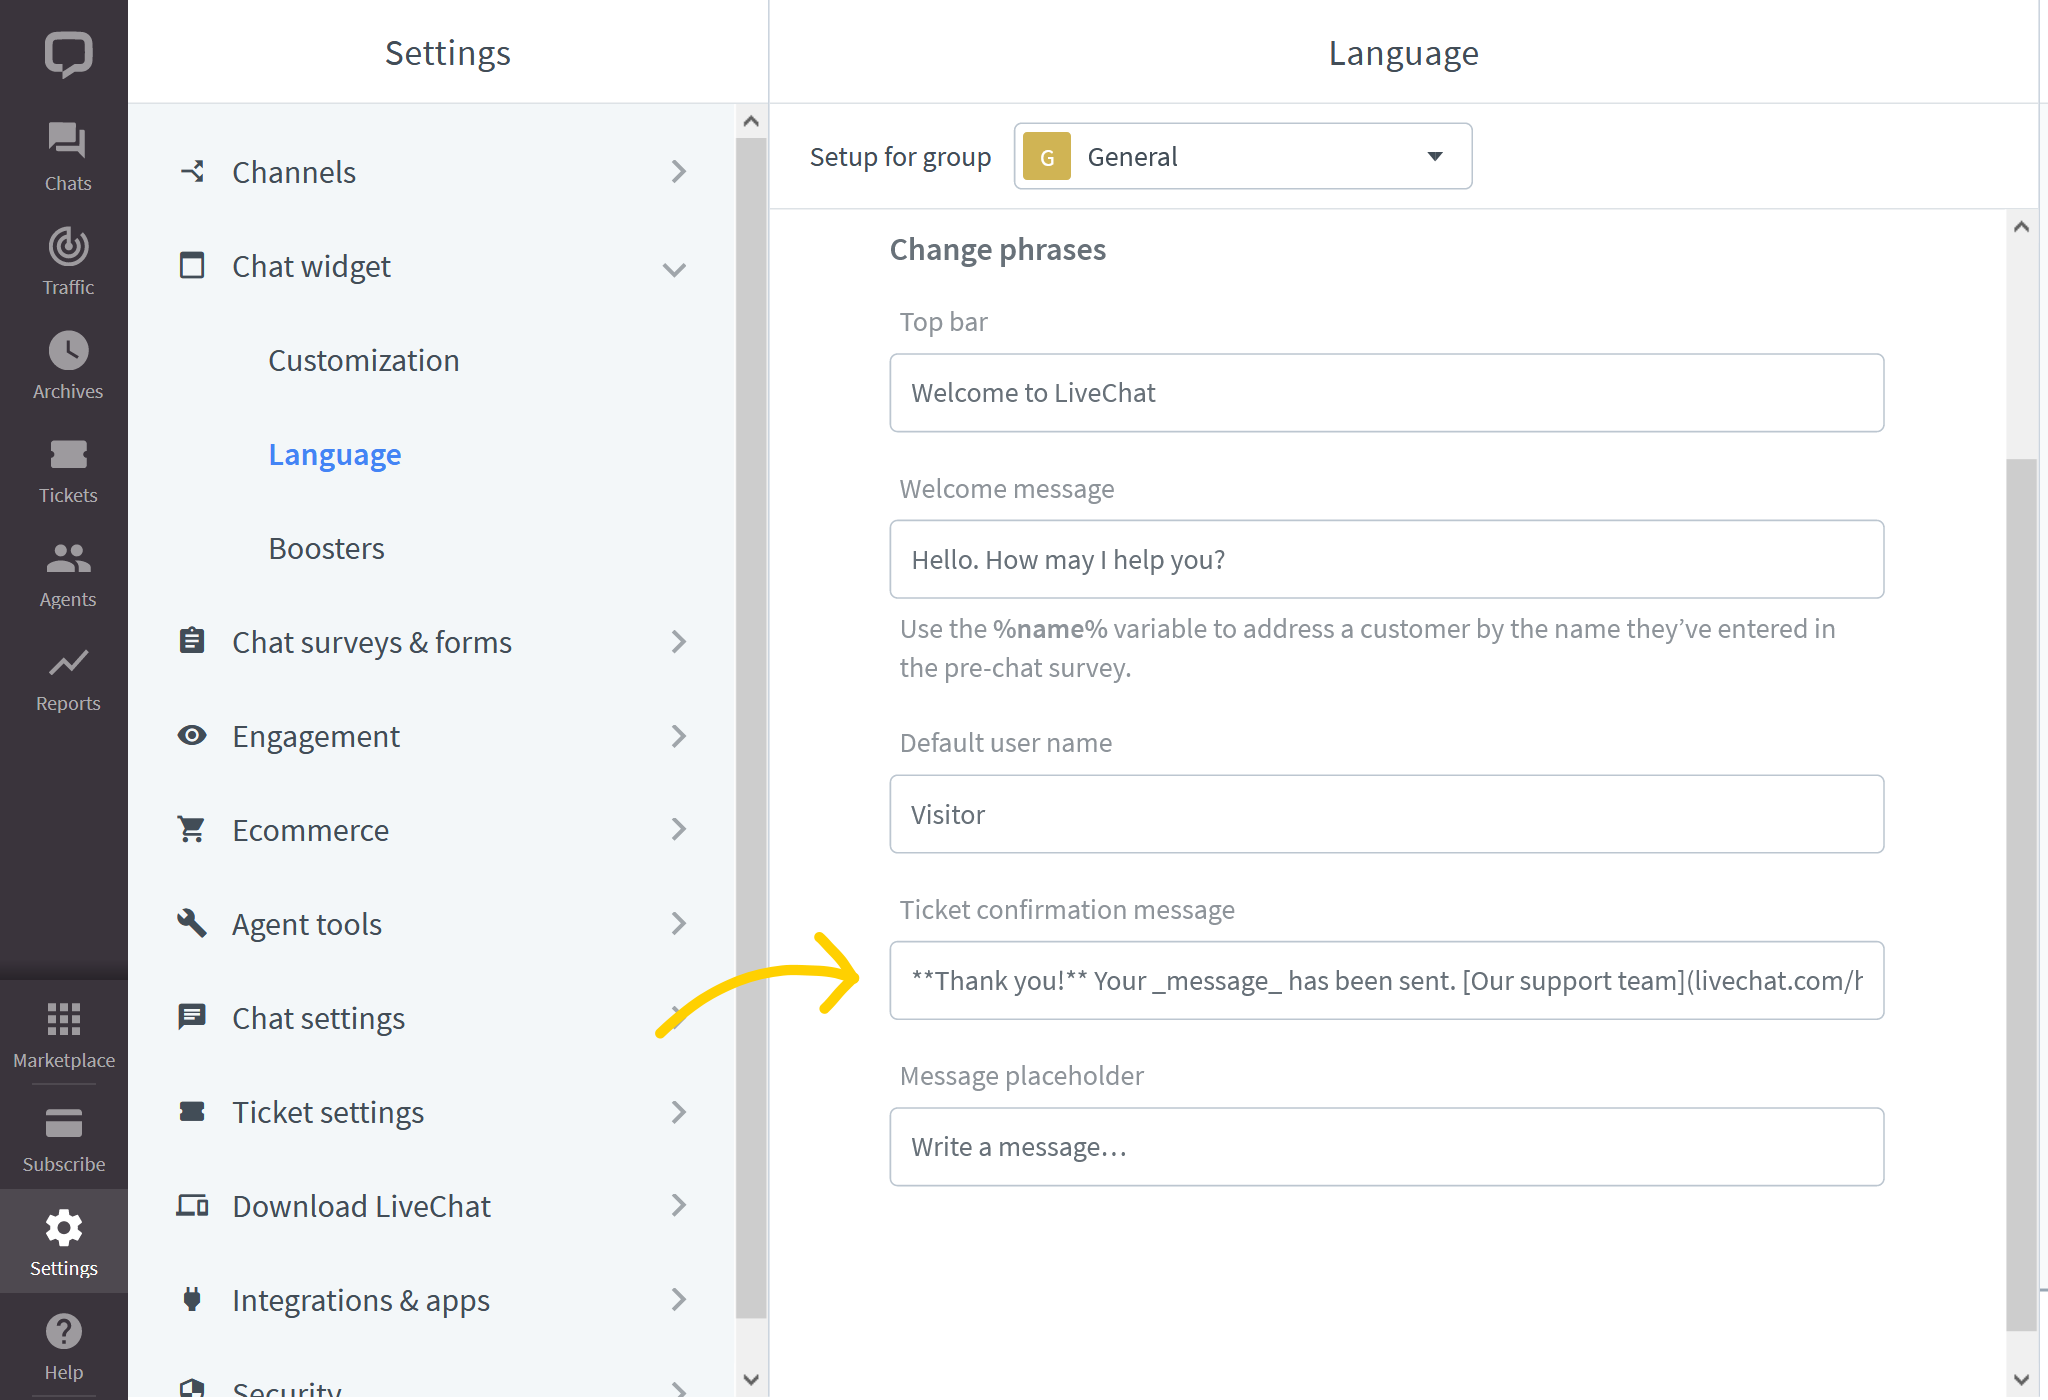
You can also use Markdown to edit the text in the ticket form confirmation and offline info. The available options are:
- Create anchored links with
[example](https://example.com) - Put the text in bold with
**example** - Put the text in italics using
_example_
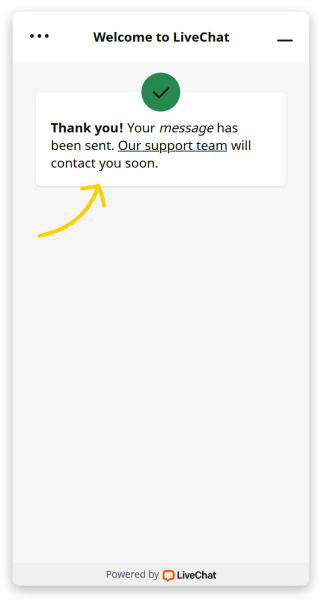
To edit the offline info or ticket confirmation message, go to Settings>Chat widget>Language.
This is an example of such an edited ticket form confirmation: